Ensure your WordPress plugins and themes are always up-to-date with our easy-to-install Auto Updater Plugin.
How to Install XYZTheme Auto Updater Plugin
How to Get Started
Before you can install the XYZTheme Auto Updater Plugin, you’ll need to purchase a membership plan from XYZTheme. This membership grants you access to automatic updates for all your XYZTheme products.
Download Plugin for freePurchase Any Membership Plan
Choose the membership plan that fits your needs and unlock automatic updates for all your XYZTheme products.
Download Auto Updater Plugin
Now ownload the XYZTheme Auto Updater Plugin to start receiving updates directly in your WordPress dashboard.
Login & Activate
Log in with your XYZTheme credentials and activate the Auto Updater Plugin to enable seamless updates for your themes and plugins
Step 1
Install and Activate
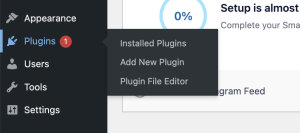
Download the latest version of the XYZTheme Updater from the link provided, and install it through your WordPress dashboard. To install, navigate to Plugins > Add New, and upload the downloaded plugin file.

Step 2

Put Your Login Crudentials
After activating the plugin, you will see a plugin named “XYZ Theme Auth” in your WordPress dashboard. Enter your login credentials here—the same credentials you used when creating your XYZTheme account.
Step 3
Update Your Plugins/ Themes
After installing and activating the plugin, you will receive notifications whenever a plugin or theme update is available. To update, simply go to the “Installed Plugins” tab in your WordPress dashboard, where you will see an update button next to each plugin. Click the button to update your plugins or themes with just one click.

Sometimes, you might not see any updates on the plugin page. In that case, simply open the GPL Auth plugin page once inside WordPress. When you visit the page, it will run the query again. This issue rarely happens, but some users have reported it, so we’ve provided this solution. After that, go to the plugins page, and you should see the update button.
